YubiKey 5 Setup
A Yubikey 5 NFC+ Setup Guide. Walks you through key generation, setup and troubleshooting.


So, this is going to be a write-up for Yubikey 5. I had some trouble setting it up and figured it would be nice to do a write-up. It is quite similar to the process with Yubikey 4, with minor changes. This guide will be using Ubuntu-based Linux, but the process should be similar on Mac. This guide is quite similar to this, with minor differences because of having a newer Yubikey.
As a sidenote, if you want one, how about participating in the LINE Bug Bounty program? (Check out the SWAG section!)
NB: This was done with a Yubikey 5 NFC+
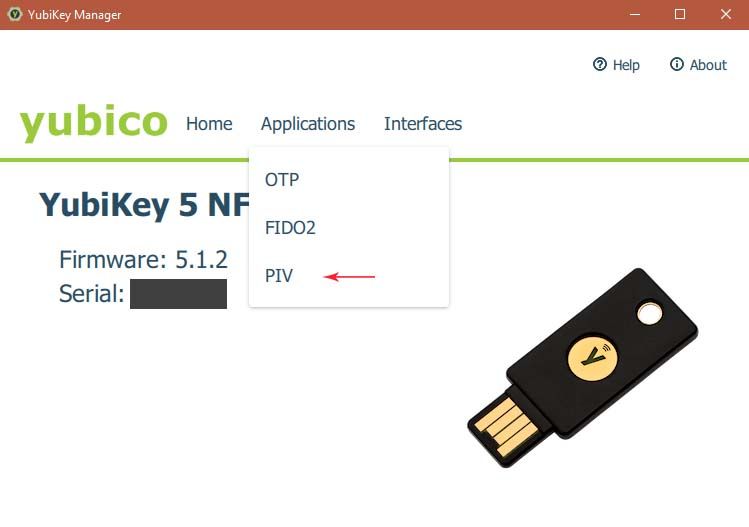
Part 1 - Preparation
1. Install YubiKey dependencies:
- Link
- I also had to add YubiKey-Manager, like this:
$ sudo apt-get install yubikey-manager
2. Set up pin codes.
- I set up the codes for my key using GUI on windows.
- There are also alternatives available for other operating systems.
- You can find the software here.
- For Windows, you can set the pin-codes here:
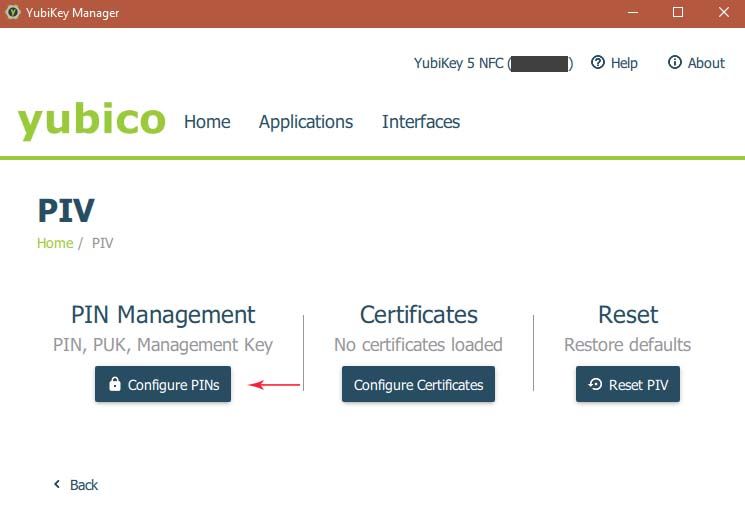
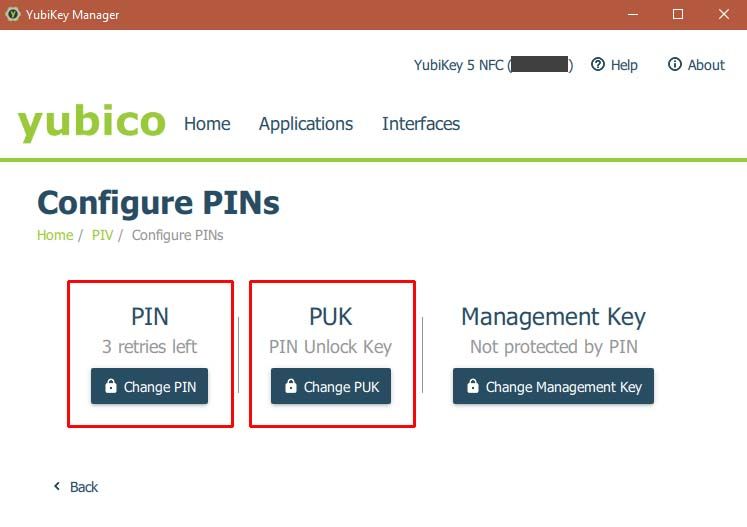
- Default PIN is 123456, Default PUK is 12345678.
- It can also be done from command line (Google is your friend!)
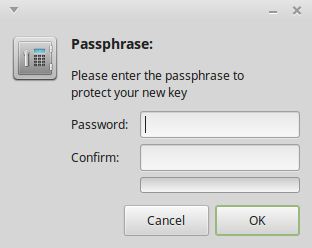
3. Generate a secure password for your new Private Key.
- NOTE: This key should be kept secret. Nobody except you should have access to this key and it should not be easy to get a hold of!
- Generate it like this:
$ gpg2 --gen-random -a 0 24

- Preferrably keep it in a password-manager or on paper somewhere only you have access to.
4. Set saving location to USB
- I assume you will be saving a backup on a USB device. If not, you still need a backup folder, so you should create a folder that will work as a backup. You will see why later, trust me!
- I did this by using a symlink from my ~/.gnupg folder to my USB device, like this:
- Rename original folder
mv .gnupg .gnupg_orig - Create symlink
ln -s [USBLOCATION] .gnupg
Mine looked like this on Linux Mint:
ln -s /media/robin/usb .gnupg
(You can find the path of your USB device by following this Guide)
5. Generate the private key
NOTE: For newer Yubikey (Yubikey 4 or higher, I believe), gpg2 is required!
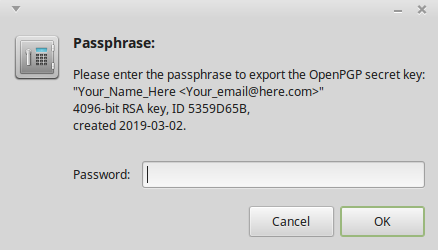
NOTE: When generating keys, you have to supply a passphrase for the generated key, as illustrated here:
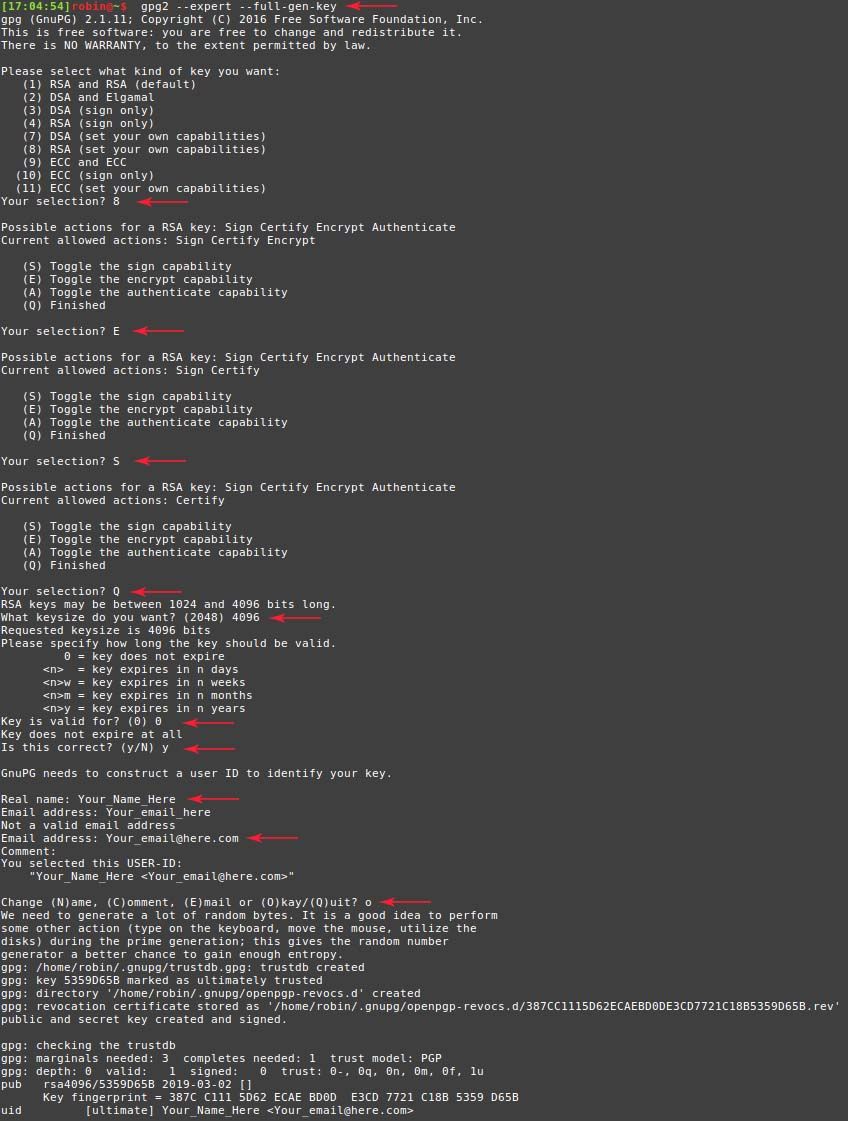
$ gpg2 --expert --full-gen-key- Select option 8
- Turn off encryption functionality (E)
- Turn on signature functionality (S)
- Continue (Q)
- Select key size (4096)
- Set no expiry date (0)
- Create key (y)
- Confirm (o)
- Enter key phrase as generated in step 3.
- If you also run in to some errors like this
gpg: can't connect to the agent: IPC connect call failed, you are not alone! - Code for fixing the issue:
$ pkill -9 gpg-agent
$ printf '%%Assuan%%\nsocket=/dev/shm/S.gpg-agent\n' > ~/.gnupg/S.gpg-agent
$ source <(gpg-agent --daemon)
(See Link1 and Link2 for more details)
6. Set a variable that stores the ID of the generated key, for your own sanity
$ export KEYID=xxxxxxxx- The ID of the key is shown here:

7. Part 1 = Complete! Good job!
Part 2 - Generate the keys for the Yubikey
1. Generate keys
NOTE:
When you generate keys, you have to provide a passphrase for the new key, as shown in the image provided in Part 1 - Section 5.
You also need to provide the passphrase for the private key (as generated in part 1), as illustrated here:
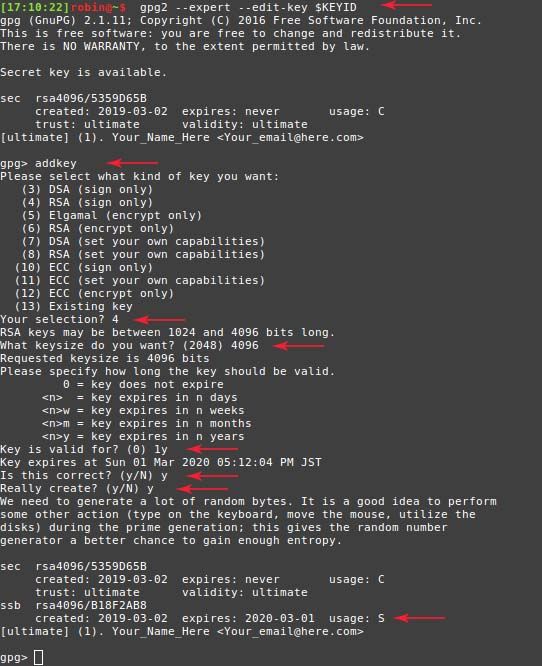
1.1 Begin with executing this command, to generate sub-keys based on the private key generated in Part 1.
$ gpg2 --expert --edit-key $KEYID
1.2 Create a signing key:
$ addkey- Select RSA Sign Only (4)
- Select 4096 bits key size (4096)
- Select how long the key should be valid for (1y)
- Confirm correct choice (y)
- Confirm key creation (y)
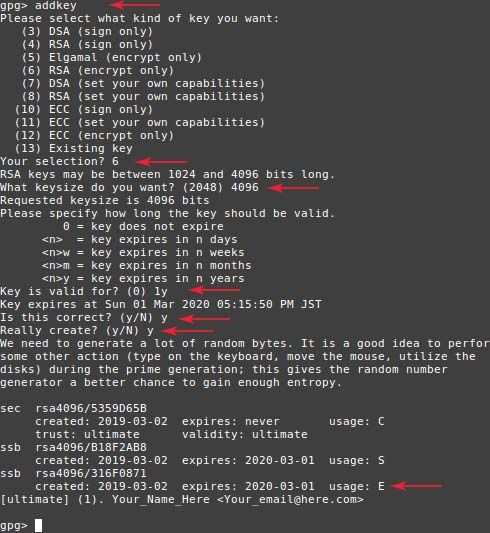
1.3 Repeat the same procedure, but create an encryption key instead.
$ addkey- Select RSA Encrypt Only (6)
- Select 4096 bits key size (4096)
- Select how long the key should be valid for (1y)
- Confirm correct choice (y)
- Confirm key creation (y)
1.4 Repeat once more, this time creating an authentication key. This is the last one!
$ addkey- Select RSA (Set your own capabilities) (8)
- Disable signing capability (S)
- Disable encryption capabilities (E)
- Enable authentication capabilities (A)
- Finish (Q)
- Select 4096 bits key size (4096)
- Select how long the key should be valid for (1y)
- Confirm correct choice (y)
- Confirm key creation (y)
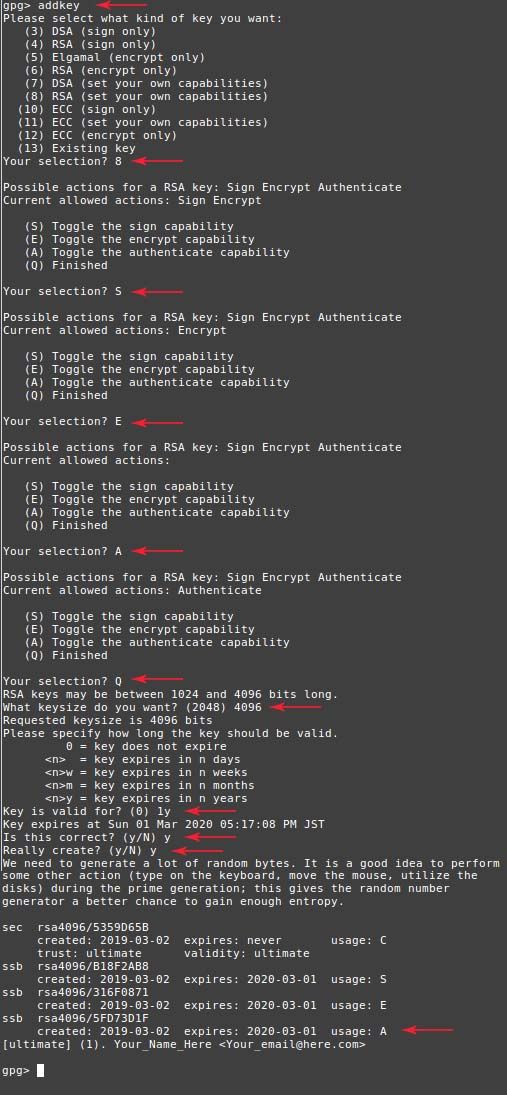
1.5 SAVE!!!!!!!!
$ save
2. Verify that your keys are saved.
$ gpg2 --list-secret-keys
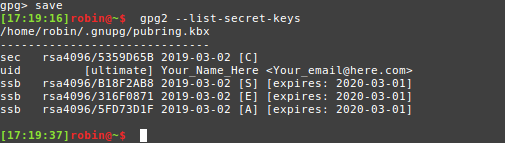
3. All good? Good! Make a copy of all the created keys!
-
Export the master sub key
$ gpg2 --armor --export-secret-keys $KEYID > master_sub.key -
Export all sub keys
$ gpg2 --armor --export-secret-subkeys $KEYID > sub_keys.key -
NOTE: These commands export the keys to the current directory! Change the path after ">" to where you want to store them. As an example, for the first command I used:
$ gpg2 --armor --export-secret-keys $KEYID > /media/robin/usb/master_sub.key
4. BACKUP KEYS!
- Make sure you copy the keys to at least one other location. When moving the keys to the Yubikey, they will be removed from the original stored location. (The operation is destructive .)
- If you did it like me and followed the instructions in Part 1 - Section 4, this is as easy as renaming the symlink we created and copying the USB contents to the original .gnupg folder.
$ mv ~/.gnupg ~/.gnupg_usb- Rename symlink folder$ mv ~/.gnupg_orig ~/.gnupg- Restore original folder$ cp -r [USBLOCATION] ~/.gnupg- Copy contents on the USB to the original .gnupg folder. [USBLOCATION] should be the same as in Part 1 - Step 4
NOTE: This assumes you have no pre-existing GPG-keys. If you do, please move them to another folder before doing this operation.
-
I also recommend storing other sensitive data that you may forget on the USB before removing it. Things like passwords, pins, etc. I stored these in a simple text file named something like IMPORTANT.txt This is OK, since we intend to keep this USB stored in a safe location.
-
If you are worried about it being insecure, you can encrypt the USB, use a different USB for storing the important information, or write it down with pen & paper. For encryption advice, see this link.
5. Remove USB and store in a safe place!
Part 3 - Transfer keys to device
NOTE: This following section is the same as in drduh's guide. As such, I have included the commands here, but if you want to see example output, please follow the added links.
WARNING:
This operation is destructive!If you do not have a backup, your keys will be moved to the Yubikey and removed locally. Keys cannot be extracted from the Yubikey!
1. Set Yubikey information
$ gpg2 --card-edit
$ admin - Activate admin role
$ name - Set owner name
$ lang - Set preferred language
$ login - Set login credentials (e-mail etc.)
$ quit - Finished!
2. Move keys
2.1 Enable editing key
$ gpg2 --edit-key $KEYID
2.2 Select and move key 1 (Signing key)
$ key 1
$ keytocard
2.3 Deselect the transferred key and select the next one to transfer
$ key 1
$ key 2
$ keytocard
2.4 Repeat as above, but with 2 and 3 respectively, instead of 1 and 2.
$ key 2
$ key 3
$ keytocard
2.5 Save the transferred keys to the Yubikey
$ save
2.6 Store public key on disk
$ gpg2 --armor --export $KEYID > pubkey.txt (Stores pubkey.txt in current folder)
2.7 OPTIONAL Upload public key to a key server
$ gpg2 --send-key $KEYID
$ gpg2 --keyserver pgp.mit.edu --send-key $KEYID
$ gpg2 --keyserver keys.gnupg.net --send-key $KEYID
Example output for 2.6 & 2.7
3. Cleanup
- Remove .gnupg folder
sudo rm -r .gnupg
Part 4 - Final points
-
The pubkey.txt file is needed for actually using the Yubikey later on, so keep it somewhere easily available. It is not sensitive, so anywhere is OK.
-
I plan to write a follow-up post on how to use the Yubikey with SSH, once I get the time to do so, so please check that out once it is available !
-
This guide was only possible thanks to the following resources. All credit to the respective creators and contributors!
-
Please ask if you have any issues or questions!
References:
- https://michaelheap.com/gpg-cant-connect-to-the-agent-ipc-connect-call-failed/
- https://stackoverflow.com/questions/46673717/gpg-cant-connect-to-the-agent-ipc-connect-call-failed/47056403#47056403
- https://github.com/drduh/YubiKey-Guide
- https://www.esev.com/blog/post/2015-01-pgp-ssh-key-on-yubikey-neo
- https://docs.kali.org/faq/how-do-i-tell-what-drive-path-my-usb-drive-is-on